"Are you going to start your cloud journey today?"
This was a question I would ask myself often. As someone who is still early in their IT career, I am always seeking ways to increase my skillset and expanding my knowledge base.
The Azure #CloudGuruChallenge, hosted by Gwyneth Peña S., challenge participants to create an Resume that will be hosted on Azure by leveraging various Cloud tools.
You can watch the walkthrough here.
Why did I do this challenge?
As mentioned earlier, I am always striving to keep my skills set. I have flirted with the major cloud platforms, as well as becoming certified (Azure Fundamentals & AWS Cloud Practitioner). But in order to have longevity, I understand that you will need to be highly versed in at least one platform. Since majority of my career experience thus far has been in Microsoft environments, it was only natural for me to gravitate towards Azure. This challenge will help me complete my first ever cloud project which will highlight my ability to illustrate my deep knowledge of various Azure tools, and how I put them to practical use. This project will also help decide if I should pursue expertise the Azure platform.
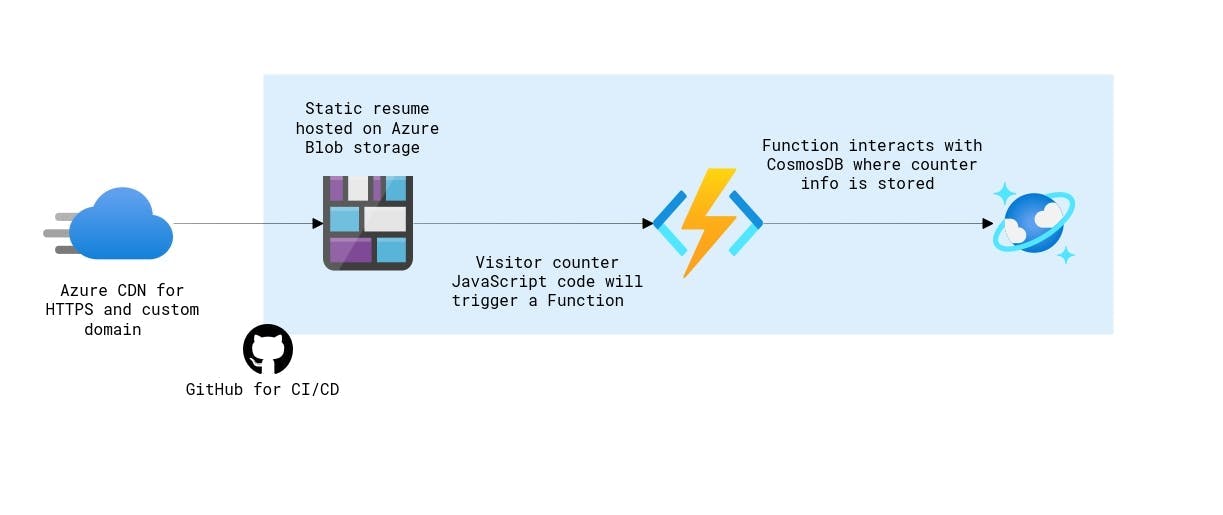
 The diagram above provides a brief walkthrough of what I will be performing in order to successfully host my resume on Azure.
Tools
Before getting started, make sure to have the following:
Phase 1: Creating Frontend
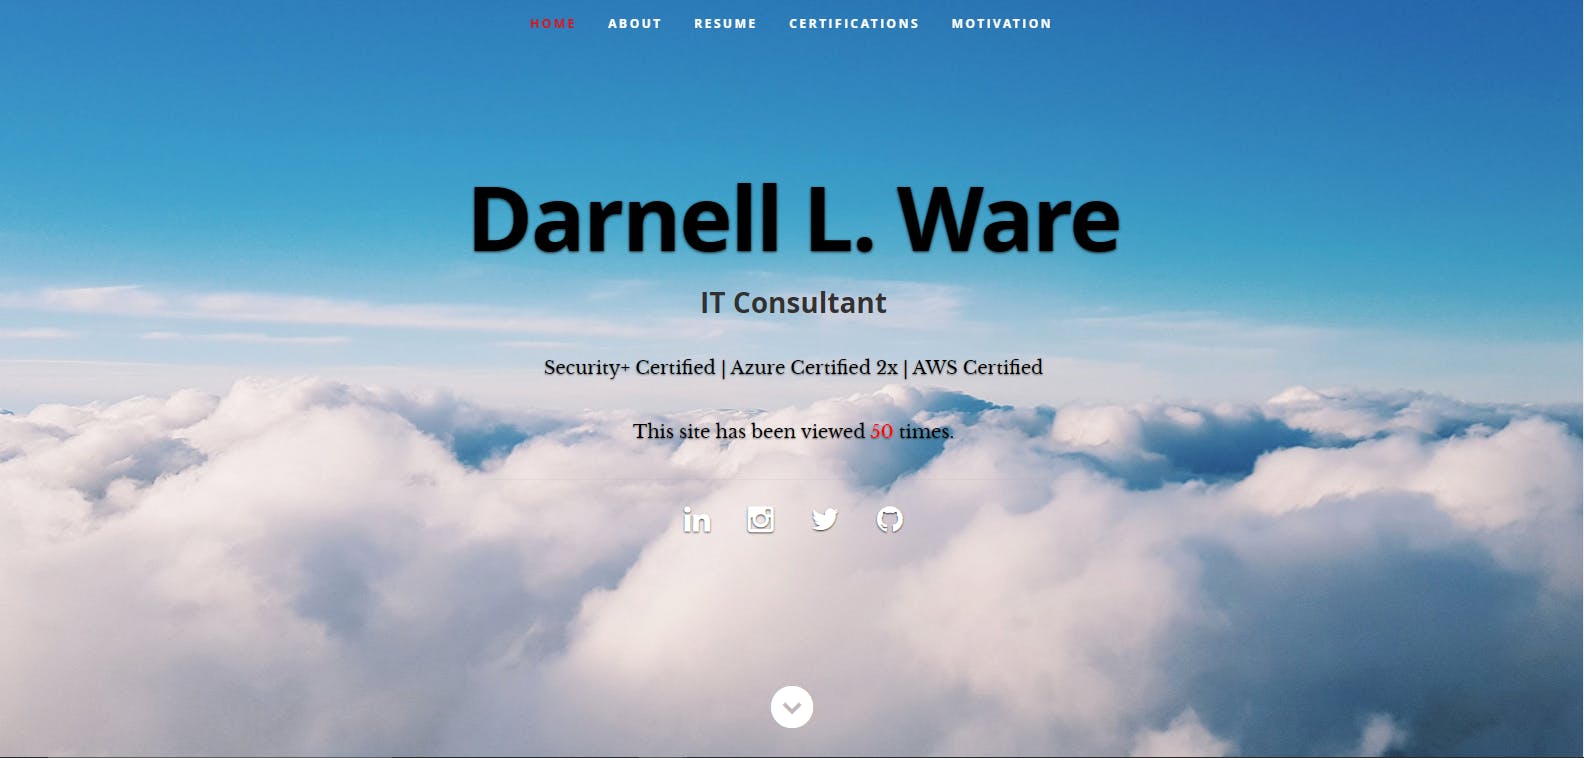
For my resume, I used a template from StyleShout that consisted of HTML and CSS.

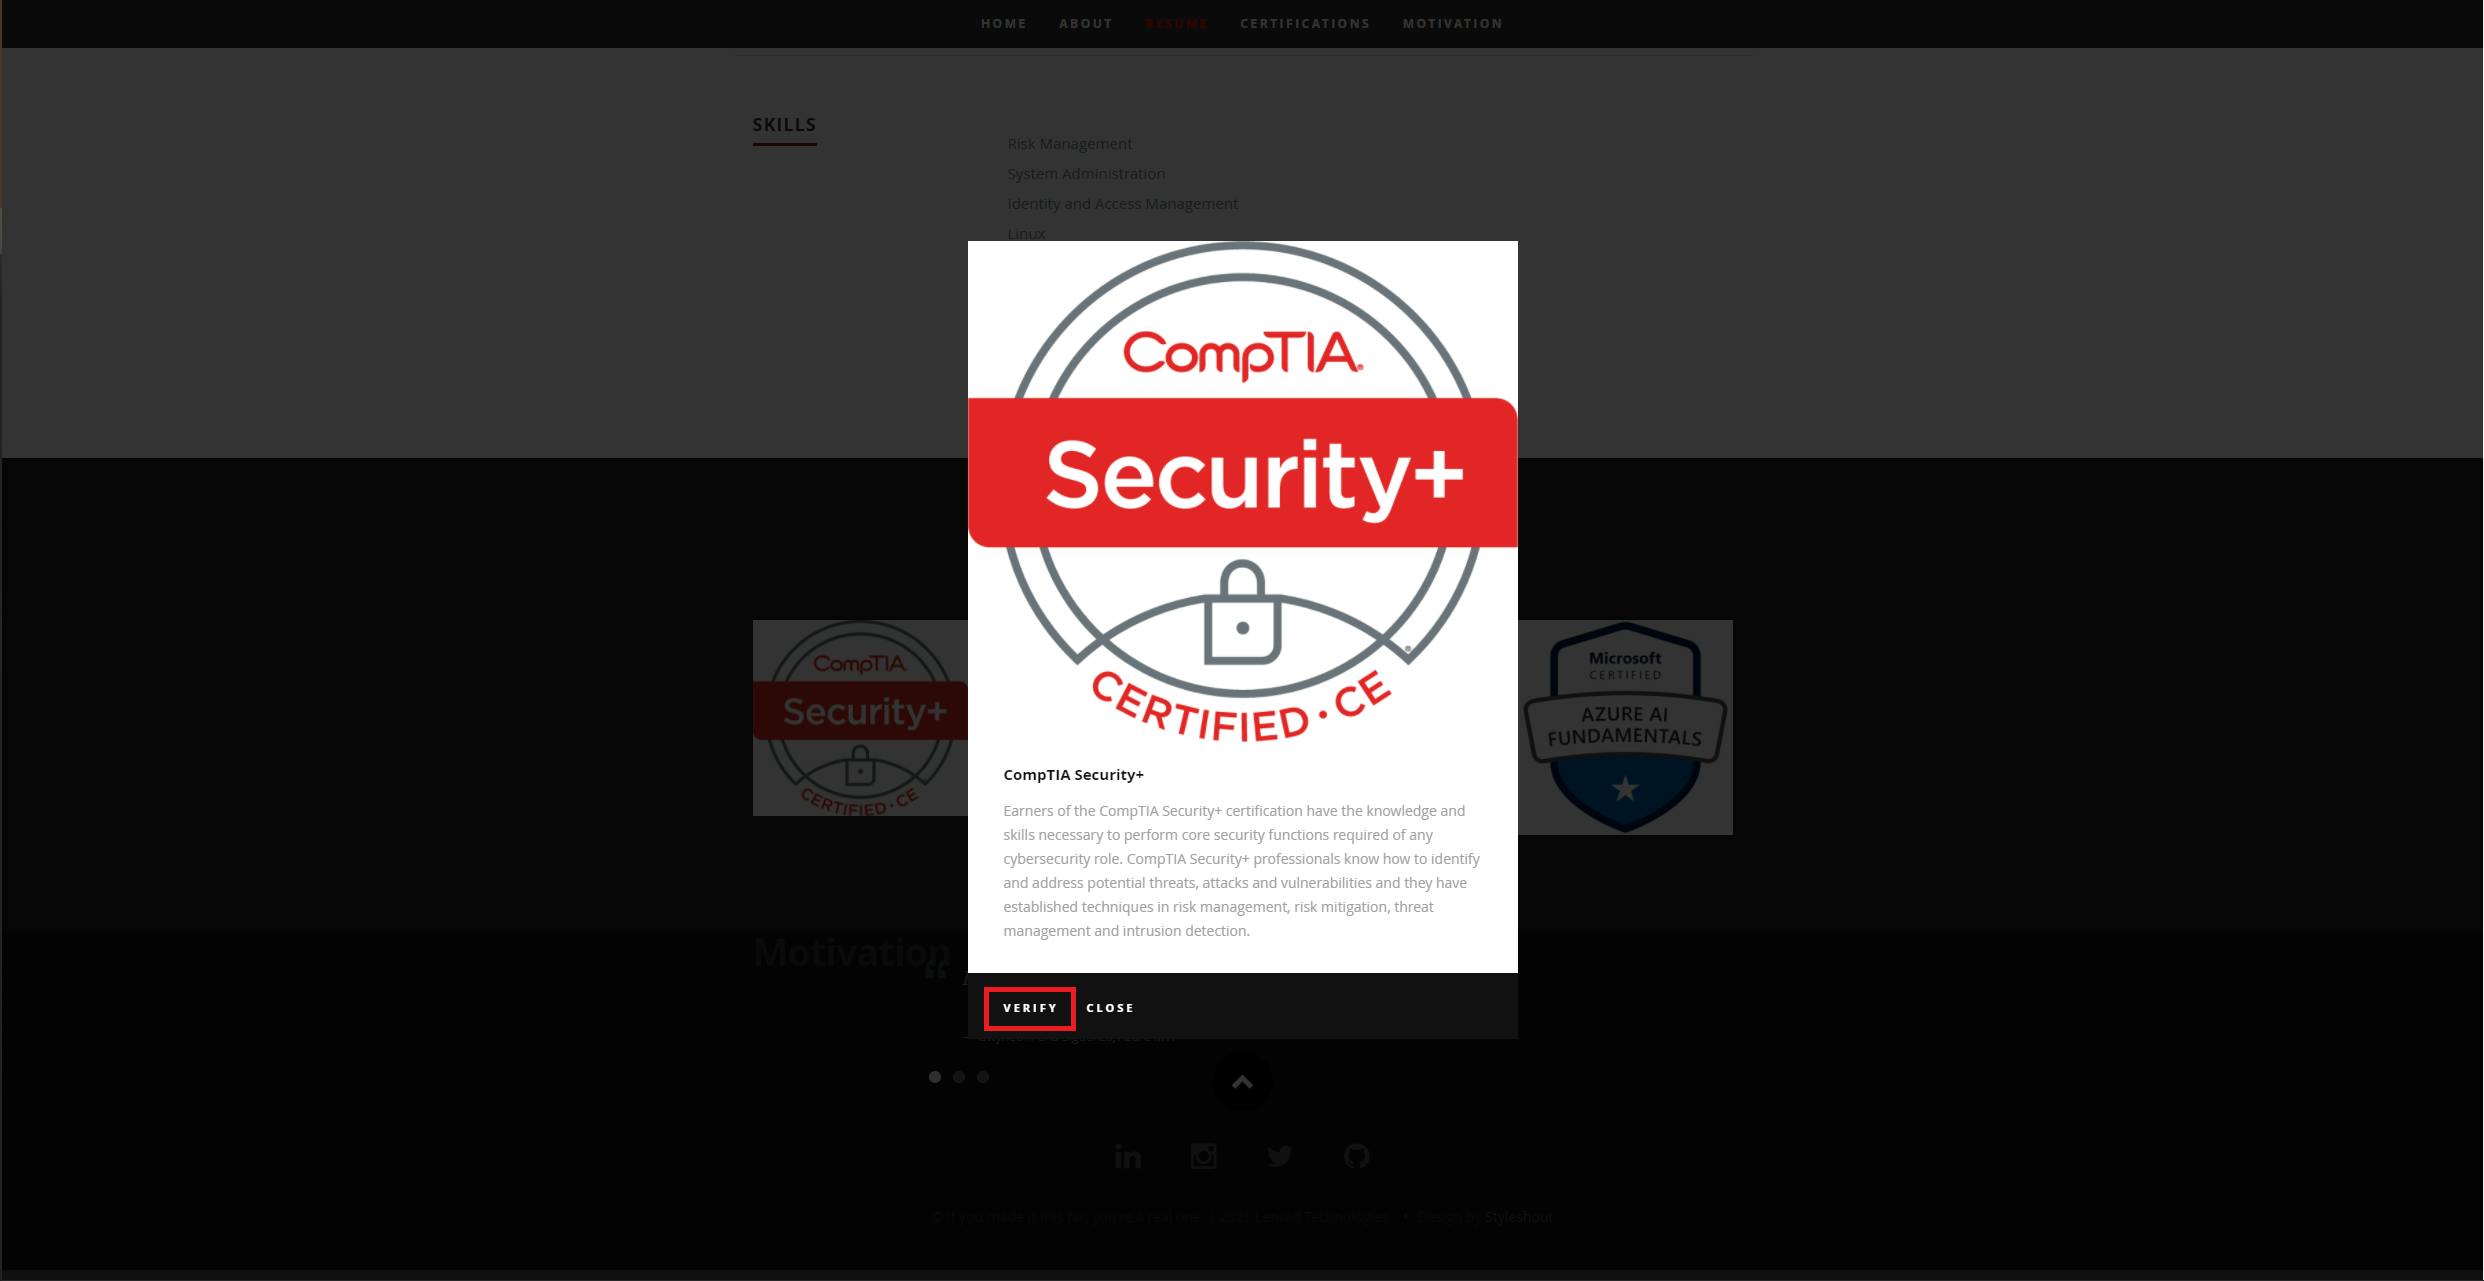
From there I proceeded to customize the HTML to include my background, links to social media, as well as a verify button to confirm my certifications.

Phase 2: Creating Backend
For this phase, I need to start off by creating a visitor counter to track how many hits the page received. In order to do this, I had to use JavaScript. This script triggers an API call that will retrieve a counter value from my database:
//This script will help display the counter on the site

window.addEventListener('DOMContentLoaded', (event) =>{
    getVisitCount();
})

const functionApiUrl = "https://getwareresumecounter.azurewebsites.net/api/GetResumeCounter?code=TM3tCKNX0hOJSeGCaLwWknyaCgDdjy2bUx17Yshq6yf3vnABrUuXVw==";
const functionApiLocal = 'http://localhost:7071/api/GetResumeCounter';

const getVisitCount = () => {
    let count = 30;
    fetch(functionApiUrl).then(response => {
        return response.json()
    }).then(response => {
        console.log("Website Called function API.");
        count = response.count;
        document.getElementById('counter').innerText = count;
    }).catch(function(error){
        console.log(error);
    });
        return count;
};
Once the JavaScript was created, I went to my Azure subscription and created a CosmosDB account. Once created, I created a container named Counter to To wrap up the backend, I needed to add an app function in order for it to interact with the counter data in CosmosDB.
Phase 3: Azure Deployment
In this phase I will upload my website to Azure. First, I retrieve the URL from my function app to add to my JavaScript. Once that is done, I deployed my site to my Blob storage within Azure.
Phase 4: Enabling HTTPS and Custom Domain Support
In this phase, I needed to point a custom domain to my static website and make sure that the site will be HTTPS enabled. To ensure this, I leveraged Azure CDN.
Phase 5: Setup Continuous Integration/Continuous Delivery (CI/CD) Pipeline with GitHub
In the final phase, I want to ensure that any changes that I make moving forward will be automatically pushed via GitHub to Azure. With CI/CD, it will create a workflow for the Frontend, implement testing, and create a Backend workflow.
THE END RESULT
Lessons Learned
As this was my first ever completed cloud project, I have a great sense of accomplishment. From being able to write out JavaScript, to being able to commit updates to GitHub, there was a degree of a learning curve. The biggest roadblock for me was that I had difficulty in displaying my visitor counter on my page. Fortunately, I was not having these challenges alone thanks to my fellow participants, who I've connected with via Discord.
Other thing to note as well include:
- Install Azure CLI on your device along with the Azure CLI Extension for Visual Studio
- Make sure Node.js is installed.
- When testing your visitor counter locally, make sure that you have CORS activated with a wildcard (*) inside your local.settings.json (shown below)
##via local.settings.json
},
  "Host":
  {
    "CORS":"*"
  }
}
What's Next?
Moving forward, I am going to continue my Linux Administration journey via this Udemy course. Once completed with my Linux course, I will leverage those skills to further my Azure expertise by pursing the Microsoft Azure Administrator Associate Certification (AZ-104).