

TrueNAS Core (formerly FreeNAS), is a free open-source software that allows you to turn any hardware into your own storage server that you can configure and manage. Rather its for personal or business, this offering will allow you to centralize your data and make it accessible.
In this walkthrough we will be installing our storage server as a virtual machine (VM).
Things you will need:
Host Machine (Windows or MacOS)
Hypervisor Software (Oracle VirtualBox or VMWare)
TrueNAS Core .iso file
First, Download the .iso file from TrueNAS website here. Takes about 2 minutes to download.
In VirtualBox, click new. From there, enter the following for your server name:
Name: TrueNAS Core
Type: BSD
Version: FreeBSD (64-bit)
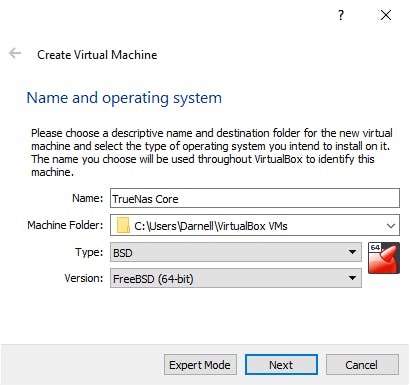
Once completed, click Next.
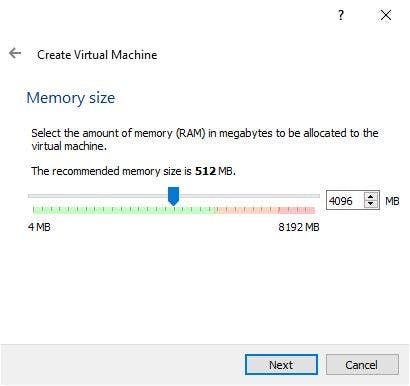
For memory (RAM) size, set it to 4096MB (4GB)
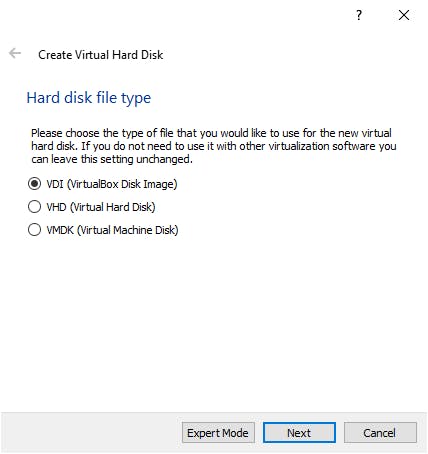
For hard disk, we will create our virtual hard disk now.
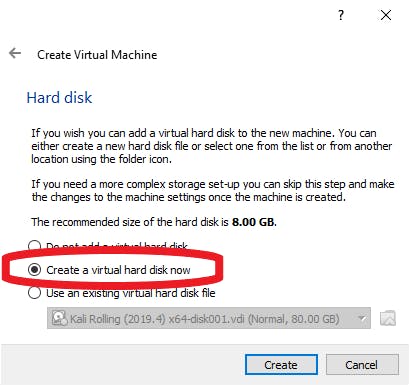
You will be asked to select your hard disk file type. We will use VDI (VirtualBox Disk Image)
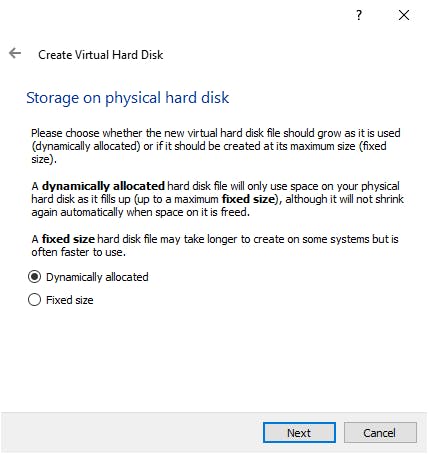
The storage on the disk will be set to dynamically allocated.
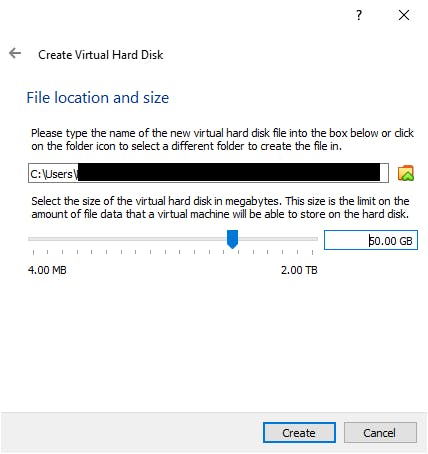
As for the size of the virtual hard disk you can make it any size you want. For this exercise we will make ours 50 GB.
Once you have done that, your new server should be available within your VirtualBox Manager.
With your newly created server highlighted, click on settings. From there, go to storage, and highlight the empty drive under Storage Devices. Finally click on the CD icon under Attributes, and select Choose/Create a virtual optical disk.
In the Optical Disk Selector, click add. From there select your TrueNAS Core .iso file from the location where you have saved it, and click choose. Highlight your .iso image in the optical disk selector, and click choose.
After you completed that, go to network, and have your adapter attached to a bridged adapter.
Once you have done that, exit settings and start your server by double-clicking it in the VM Manager.
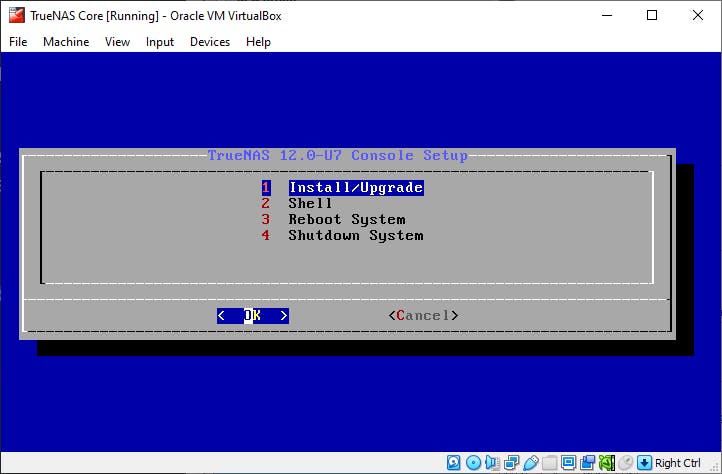
On the initial setup screen, highlight install/upgrade, and press enter.
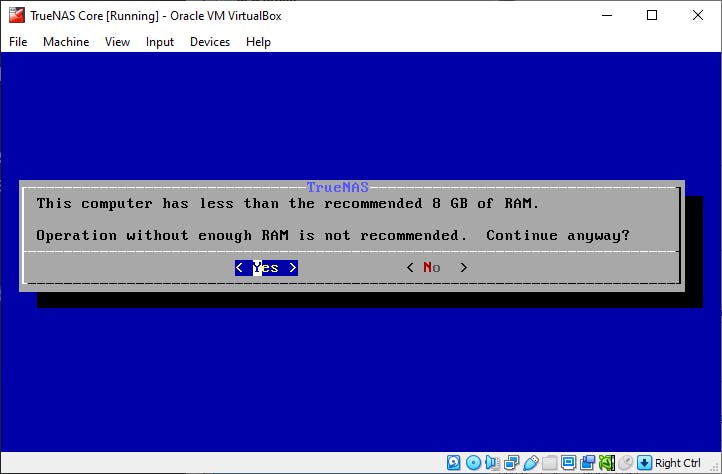
Once on this page, select Yes.
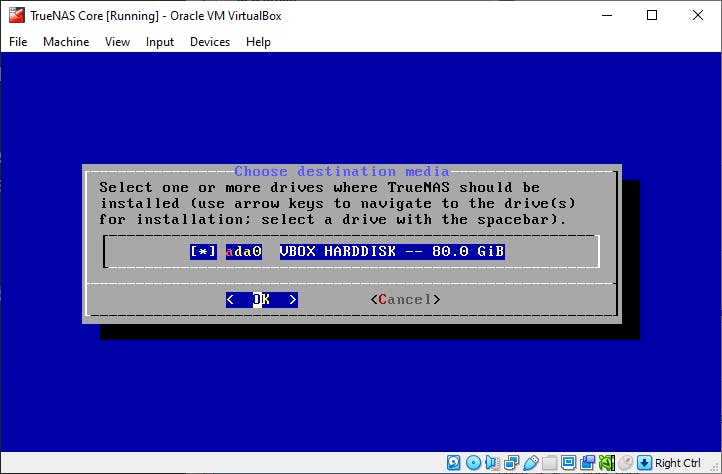
On this page, tap the spacebar to select the vHD that yoou created earlier as your destination media. Once done, select Yes.
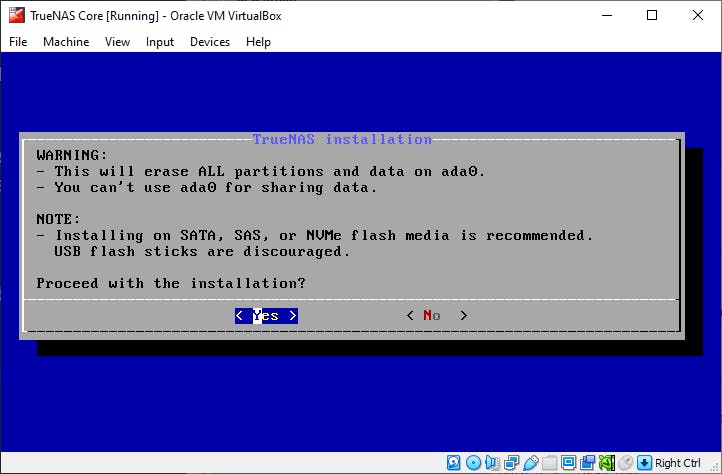
Once on this page, select Yes to proceed with the installation.
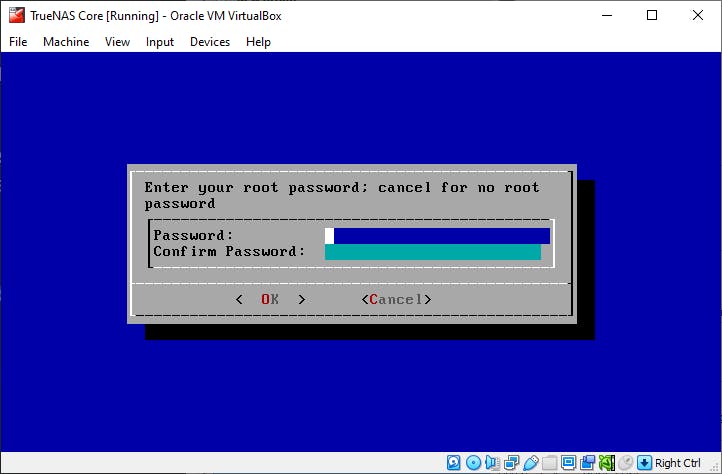
On this page, create your root password.
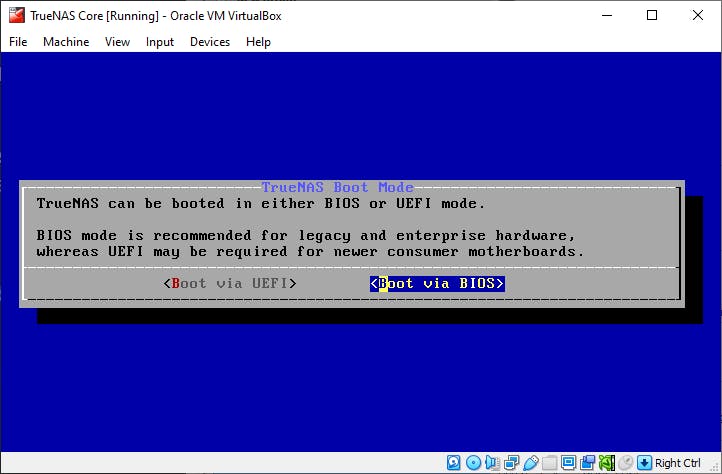
Once on this page, select Boot via BIOS as Boot mode.
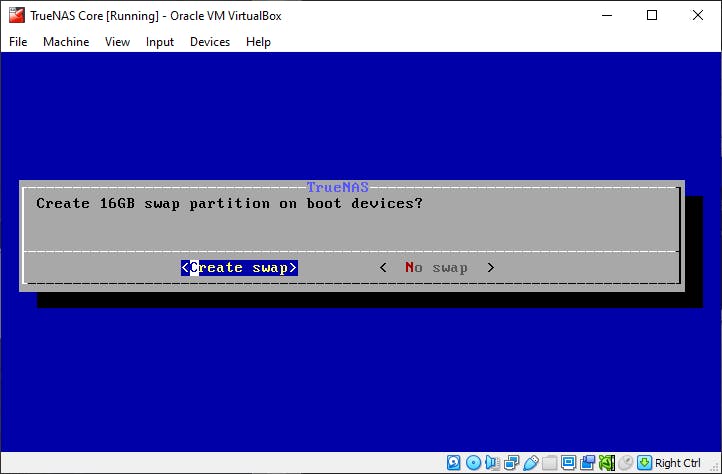
Once on this page, select Create swap to allow the partition to be created.
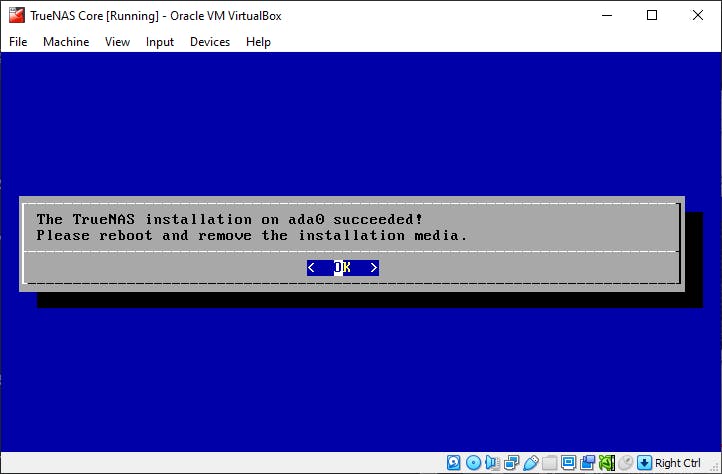
Once installation completes, select OK. From there, shutdown your machine.
After you have shut down your server, go to your machine's settings, go to storage, and detach the .iso file.
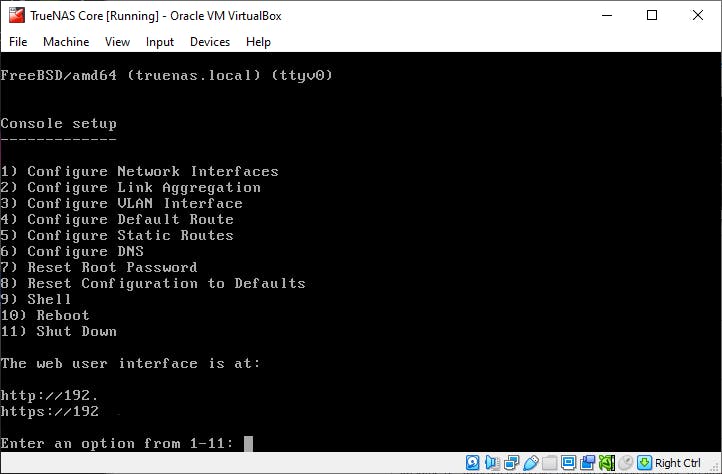
Once you have restarted your TrueNAS Machine, and its fully booted, connect to it by entering the IP address assigned to the server into your web browser
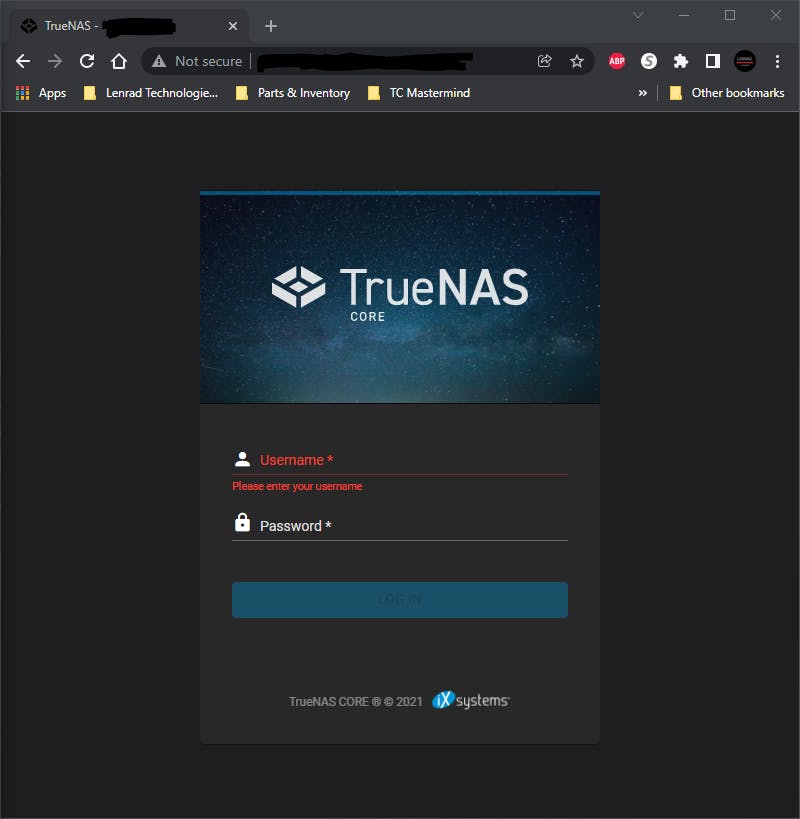
On the logon page enter your root credentials.
Once you have entered your credentials, you should now be directed to your main dashboard
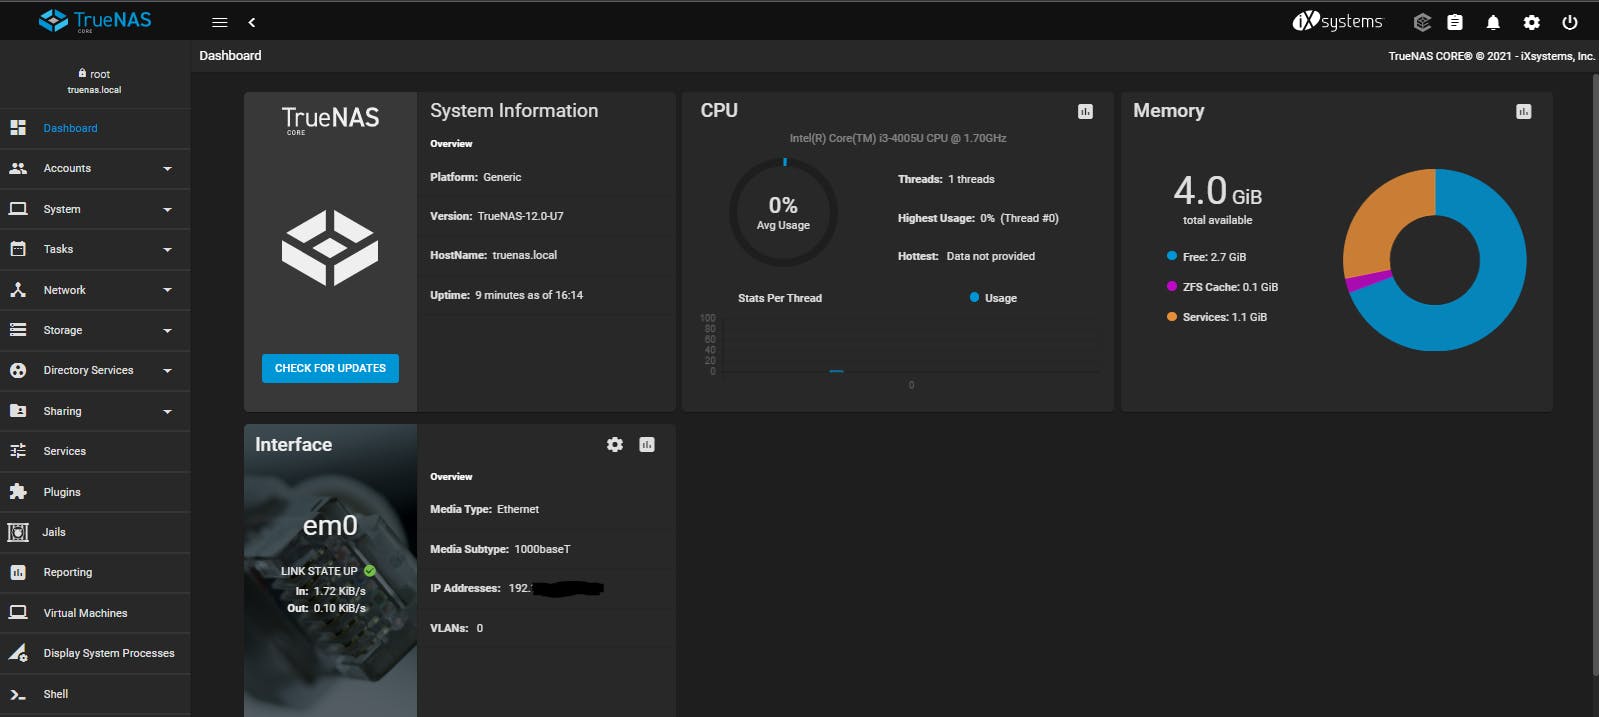
Congrats! You have now established your own network storage server.
If you have any further questions or comments, you can contact me on LinkedIn, Twitter, or Instagram.